
ezCater integration with Shipday
Connect your ezCater stores to Shipday by inviting a dedicated integration user and completing activation with Shipday Support.
-
You need a Shipday account, access to manage users and permissions in ezCater, and the list of ezCater stores you want Shipday to handle. Create your free Shipday account here (if you don’t have one)
-
Email support@shipday.com with the subject “ezCater integration setup”, your Shipday account email and your store names. Shipday Support will provide the dedicated integration email address to invite.
-
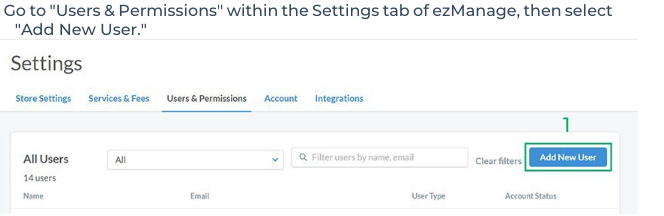
In ezCater, go to
Settings>Users & Permissions>Add New User.
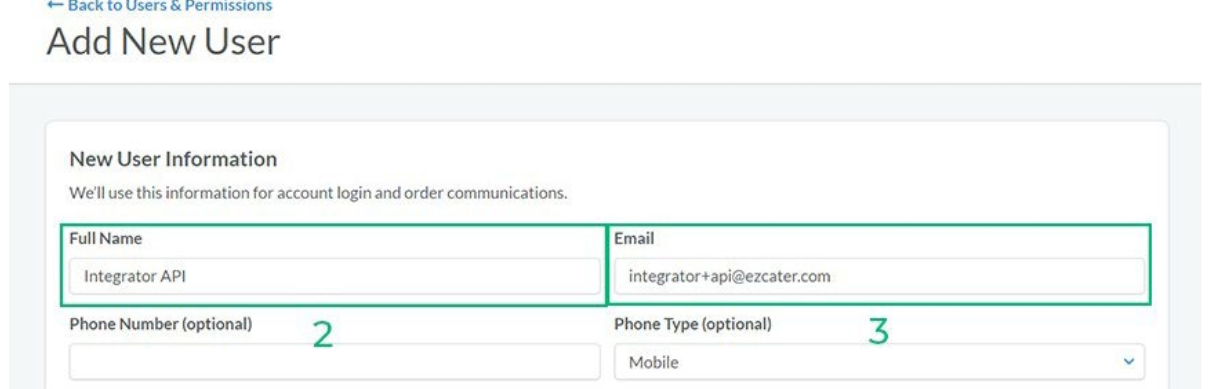
- Set Full Name to
Integrator API. In Email, enter the exact integration email address supplied by Shipday Support. The address shown in the screenshot is an example.
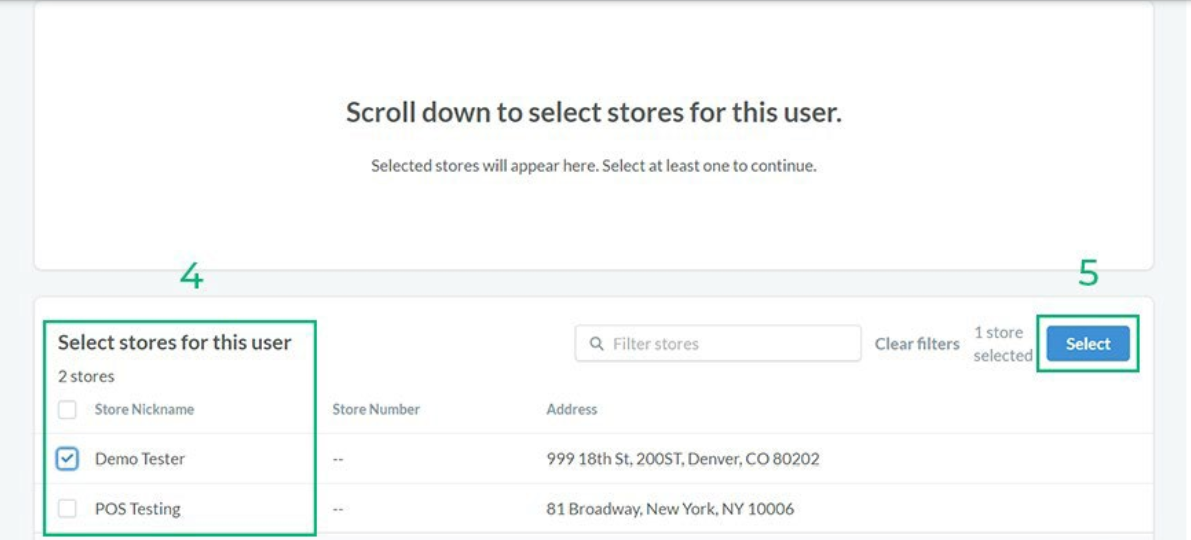
- Choose the stores Shipday will handle and click
Select.
- Click
Send Invitation.

-
Return to the user profile and enable
Integrationpermission. If you cannot enable it, contact ezCater Support or ask Shipday Support to help coordinate this step. -
Tell Shipday Support that the invitation has been sent and Integration permission is enabled. Wait for confirmation that setup is complete.
-
After Shipday confirms activation, arrange a test order with Support and confirm that it appears under the intended store.
If you need help, email support@shipday.com with the subject “ezCater integration help”. Include your Shipday account email, store name and the step where you need assistance.
Need help? Email support@shipday.com
Ready to get started?
Play around with it first, add your team, pay later.